Affiliate links on Android Authority may earn us a commission.Learn more.
Create a scrollable widget for your Android app
July 12, 2025
Since the early days of the OS, widgets for Android have allowed users to engage with their favourite apps, from the comfort of their homescreen. So how do you create an Android widget?
For the developer, widgets give your application a valuable presence on the user’s homescreen. Instead of being tucked out of sight in the app drawer, users will be reminded about your appevery single timethey glance at their homescreen – while also getting a preview of your app’s most interesting and useful content.
In this article, I’ll show you how to provide a better user experience while encouraging users to engage with your app, by creating an Android widget! By the end of this article, you’ll have created a scrollable collection widget that displays a complete data set on the user’s homescreen.
To ensure you’re delivering the kind of widget that userswantto place on their homescreen, we’ll also be creating a configuration Activity, which will allow users to customize the widget’s content, appearance and features. Finally, I’ll show how you may encourage people to use your widget, by creating a Widget Preview image that showcases the best that your widget has to offer.

Also read:Developing for foldable devices: What you need to know
What are widgets for Android?
An application widget is a lightweight, miniature application that lives on the user’s homescreen.
Widgets for Android can provide a range of content, but generally fall into one of the following categories:
Does my project really need an application widget?
There’s several reasons why you should consider adding an application widget to your Android project.
Widgets for Android can improve the user experience
As a general rule, the fewer navigational steps required to complete a task, the better the user experience.
By providing an application widget, you can remove multiple navigational steps from your app’s most commonly-used flows. In the best case scenario, your users will be able to get the information they need just by glancing at their homescreen, or perform the desired task simply by tapping a button in your control widget.
More powerful than application shortcuts
App widgets often respond to onClick events by launching the top level in the associated application, similar to an application shortcut. However, widgets can also provide direct access to specific Activities within an application, for example tapping a widget’s New Message Received notification might launch the associated app with the new message already open.
By embedding multiple links in your widget’s layout, you can provide one-tap access to all of your app’s most important Activities, removing even more navigational steps from your most commonly-used flows.
Note that widgets respond to onClick events only, which prevents users from accidentally interacting with your widget while they’re swiping around the homescreen. The only exception is when the user is attempting to delete your widget by dragging it towards their homescreen’s Remove action, as in this scenario your widget will respond to a vertical swipe gesture.
This interaction is managed by the Android system, so you don’t need to worry about manually implementing vertical swipe support in your widget.
Create an Android widget to drive long-term engagement
Convincing people to download your app is only the first step to creating a successful Android application. Chances are, if you grab your own Android smartphone or tablet and swipe through the app drawer, then you’ll discover multiple apps that you haven’t used in days, weeks or potentially even months!
Read also:Getting started with the Facebook for Android SDK
Once your app is successfully installed on the user’s device, you’ll need to work hard to keep them engaged and enjoying your app. Giving your app a presence on the homescreen can be a powerful tool to help drive long-term engagement, simply because it’s a constant reminder that your application exists!
A well-designed widget can also serve as an ongoing advert for your app. Every time the user glances at their homescreen, your widget has the opportunity to actively encourage them to re-engage with your app, by presenting them with all of your app’s most interesting and useful content.
Creating a collection app widget
In this tutorial, we’ll be building a collection widget that displays an array as a scrollable ListView.
To help you track the app widget lifecycle, this widget will also trigger various toasts as it moves through the different lifecycle states. Towards the end of this tutorial, we’ll be enhancing our widget with a custom preview image that’ll be displayed in Android’s Widget Picker, and a configuration Activity, which will allow users to customize the widget before placing it on their homescreen.
Create a new Android project with the settings of your choice, and let’s get started!
Building your widget’s layout
To start, let’s define the widget’s user interface (UI).
Application widgets are displayed in a processoutsideyour application, so you may only use layouts and Views that are supported by RemoteViews.
When building your layout, you’re restricted to the following:
Note that subclasses of the above classes and Views arenotsupported.
Create a new layout resource file named list_widget.xml. Since we’ll be displaying our data using a ListView, this layout mainly serves as a container for a element:
Populating the collection widget
Next, we need to create a data provider for our ListView. Create a new Java class named DataProvider.java and add the following:
AppWidgetProvider: Configuring your widget
To create an Android widget, you need to create several files.
Our first widget-specific file is an AppWidgetProvider, which is a BroadcastReceiver where you’ll define the various widget lifecycle methods, such as the method that’s called when your widget is first created and the method that’s called when that widget is eventually deleted.
Create a new Java class (File > New > Java Class) named CollectionWidget.
To start, all widget provider files must extend from the AppWidgetProvider class. We then need to load the list_widget.xml layout resource file into a RemoteViews object, and inform the AppWidgetManager about the updated RemoteViews object:
Create the adapter
Since we’re displaying our data in a ListView, we need to define a setRemoteAdapter() method in our AppWidgetProvider. The setRemoteAdapter() is equivalent to calling AbsListView.setRemoteViewsAdapter() but is designed to be used in application widgets.
In this method, we need to define the id of the AdapterView (R.id.widget_list) and the intent of the service that’ll eventually provide the data to our RemoteViewsAdapter – we’ll be creating this WidgetService class shortly.
Defining the widget lifecycle methods
In our AppWidgetProvider, we also need to define the following widget lifecycle methods:
Retrieving new content with onUpdate
The onUpdate() widget lifecycle method is responsible for updating your widget’s Views with new information.
This method is called each time:
This is also where you’ll register any event handlers that your widget should use.
When updating an Android widget, it’s important to remember that users can create multiple instances of the same widget. For example, maybe your widget is customizable and the user decides to create several “versions” that display different information, or provide access to unique functionality.
When you call onUpdate(), you need to specify whether you’re updating every instance of this widget, or a specific instance only. If you want to update every instance, then you may use appWidgetIds, which is an array of IDs that identifies every instance across the device.
In the following snippet, I’m updating every instance:
Note that to help keep the code straightforward, this onUpdate() method isn’t currently making any changes to the widget.
onEnabled: Performing the initial setup
The onEnabled() lifecycle method is called in response to ACTION_APPWIDGET_ENABLED, which is sent when an instance of your widget is added to the homescreen for thefirsttime. If the user creates two instances of your widget, then onEnabled() will be called for the first instance, butnotfor the second.
The onEnabled() lifecycle method is where you should perform any setup that’s required for all instances of your widget, such as creating the database that’ll feed your widget information.
I’m going to display a toast, so you can see exactly when this lifecycle method is called:
Note that if the user deletes all instances of your widget and then creates a new instance, then this is classed as the first instance, and the onEnabled() lifecycle method will be called once again.
Cleaning up, with onDisabled
The onDisabled() method is called in response to ACTION_APPWIDGET_DISABLED, which is triggered when the user deletes thelastinstance of your widget.
This widget lifecycle method is where you should cleanup any resources you created in the onEnabled() method, for example deleting the database you created in onEnabled().
To help keep our code straightforward, I’ll simply be displaying a toast every time this method is triggered:
The completed AppWidgetProvider
Your CollectionWidget file should now look something like this:
The AppWidgetProviderInfo file
Your application widget also requires an AppWidgetProviderInfo file, which defines several important properties, including your widget’s minimum dimensions and how frequently it should be updated.
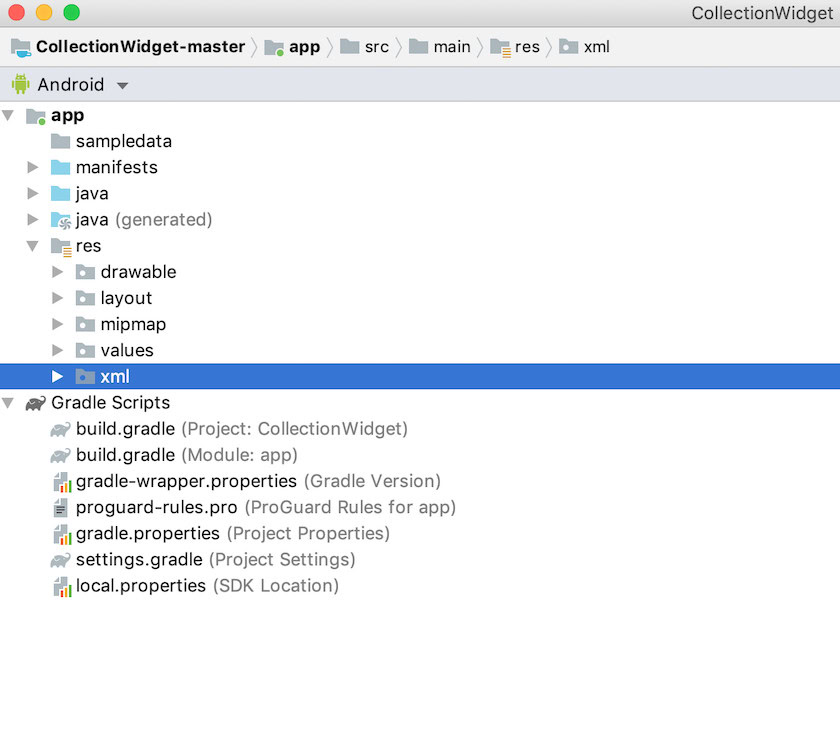
The AppWidgetProviderInfo file is stored in your project’s res/xml folder.
If your project doesn’t already contain this folder, then you’ll need to create it:
Next, create a collection_widget_info file, which we’ll be using as our AppWidgetProviderInfo:
In our AppWidgetProviderInfo file, we need to define the following properties:
1. android:previewImage
This is the drawable that represents your application widget in the device’s Widget Picker.
If you don’t provide a previewImage, then Android will use your application’s icon instead. To encourage users to select your widget from the Widget Picker, you should provide a drawable that shows how your widget will look once it’s properly configured on the user’s homescreen.
The easiest way to create a preview image, is to use the Widget Preview application that’s included in the Android emulator. This app lets you configure your widget and then generate an image, which you may then use in your Android project.
We’ll be creating this image once we’ve finished building our widget, so for now I’ll be using the automatically-generated mipmap/ic_launcher resource as a temporary preview image.
2. android:widgetCategory
Application widgets must be placed inside an App Widget Host, which is usually the stock Android homescreen, but can also be a third party launcher such asEvie LauncherorNova Launcher.
Between API levels 17 and 20, it was possible to place application widgets on the homescreenorthe lockscreen, but lockscreen support was deprecated in API level 21.
You can specify whether your app widget can be placed on the homescreen, the lockscreen (which Android refers to as the “keyguard”) or both, using the android:widgetCategory attribute. Since it’s not possible to place widgets on the lockscreen in the most recent versions of Android, we’ll be targeting the homescreen only.
If you give users the option to place your widget on the lockscreen, then anyone who glances at the user’s device could potentially see your widget, and all of its content. To help preserve the user’s privacy, your widget shouldn’t display any sensitive or private information when it’s placed on the lockscreen. If your widget does contain personal data, then you may want to consider providing separate homescreen and lockscreen layouts.
3. android:initialLayout
This is the layout resource file that your widget should use when it’s placed on the homescreen, which for our project is list_widget.xml.
4. android:resizeMode=”horizontal|vertical”
The android:resizeMode attribute lets you specify whether your widget can be resized horizontally, vertically, or along both axes.
To ensure your widget displays and functions correctly across a variety of screens, it’s recommended that you allow your widget to be resized horizontallyandvertically, unless you have a specific reason not to.
5. android:minHeight and android:minWidth
If your widget is resizable, then you need to ensure the user doesn’t shrink your widget to the point where it becomes unusable. You can use the minHeight and minWidth attributes to define the smallest your app will shrink when it’s being resized by the user.
These values also represent your widget’s initial size, so if your widget isn’t resizable then minHeight and minWidth will define the widget’s permanent sizing.
6. android:updatePeriodMillis
The AppWidgetProviderInfo is also where you’ll specify how often your widget should request new information.
The smallest supported update interval is once every 1800000 milliseconds (30 minutes). Even if you declare a shorter update interval, your widget will still only update once every half an hour.
While you may want to display the latest information as quickly as possible, the systemwillwake a sleeping device in order to retrieve new information. Frequent updates can burn through a device’s battery, particularly during periods where the device is left idle for a significant period of time, such as overnight. Providing the best possible user experience means striking a balance between limiting battery consumption, and providing new information within a reasonable time frame.
You should also take into account the kind of content your widgets for Android will display. For example, a weather widget may only need to retrieve an updated forecast once per day, whereas an app that displays breaking news will need to update more frequently.
To find this perfect balance, you may need to test your widget across a range of update frequencies and measure the impact on battery life, and the timeliness of your widget’s content. If you have a willing group of testers, then you could even setup A/B testing, to see whether some update frequencies are received more positively than others.
Aalso read:AndroidManifest.xml everything you need to know
Finally, once you’ve identified the perfect update interval, you may want to use a shorter interval when developing and testing your app. For example, you could use the shortest possible update frequency (android:updatePeriodMillis=”1800000″) when you’re testing that your app’s onUpdate() method is triggering correctly, and then change this value before releasing your app to the general public.
The completed AppWidgetProviderInfo
The finished collection_widget_info.xml file should look something like this:
Don’t clutter the user’s homescreen!
To ensure the homescreen never looks cluttered, we’re going to add some padding and margins to our widget. If your project doesn’t already contain a dimens.xml file, then you’ll need to create one:
Open your dimens.xml file and define the following margin and padding values:
Sending data to the widget
Next, we need to create a widget service, which will be responsible for sending our collection data to the widget.
Create a new Java class (New > Java Class) named WidgetService, and add the following:
Registering your widget in the Manifest
We now need to make some changes to our project’s Manifest.
To start, open the Manifest and register your widget as a BroadcastReceiver. We also need to add an intent filter for the android.appwidget.action.APPWIDGET_UPDATE action:
Next, you need to specify the app widget provider:
Finally, we need to declare the service that will send data to our widget, which in this instance is the WidgetService class. This service requires the android.permission.BIND_REMOTEVIEWS permission:
Put your widget to the test
If you’ve been following along with this tutorial, then you’ll now have a complete collection widget that displays a set of data on the user’s homescreen.
If this was a real-life Android project, then you’d typically expand on the lifecycle methods, particularly the onUpdate() method, but this is all we need to create a widget that you can install and test on your Android device:
This is all you need to deliver a functioning Android application widget, but there’s a few additions that can often improve the user experience. In the following sections, we’ll encourage users to choose this widget from the Widget Picker, by creating a preview image that showcases the widget at its best. I’ll also show you how to create a fully-customizable widget, by adding a configuration Activity to your project.
Creating an Android widget preview image
If you grab your Android device and swipe through the Widget Picker, you’ll see that every widget is represented by an image, which usually demonstrates how this widget will look once it’s configured on the user’s homescreen.
To encourage users to select your widget, you should provide a preview image that highlights all of the useful information and features that your widget has to offer.
you may quickly and easily create a preview image, using the Widget Preview application that’s included in the Android emulator.
Note that Widget Preview isn’t included in the latest Android system images, so you’ll need to create an AVD using Nougat (API Level 25) or earlier:
Your widget will now use this new image resource as its preview image:
Customizable widgets: Adding a configuration Activity
A configuration Activity launches automatically when the user places each instance of your widget on their homescreen.
There’s several reasons why you might want to add a configuration Activity to your project.
Firstly, some widgets require initial setup, for example a widget that displays traffic alerts might need to know the user’s home address, where they work, and the times when they typically commute. Without some way to enter this information, your widget might be completely useless!
In addition, widgets tend to provide the best user experience when they provide access to the information or features that are most important to the individual user. By adding a configuration Activity to your project, you can give users the freedom to pick and chooseexactlywhat’s included in your widget.
Even relatively straightforward customizations, such as changing a widget’s background or font, can have a positive impact on the user experience – after all, no-one’s going to appreciate a widget that visually clashes with the rest of their homescreen!
Alternatively, sometimes you may have a long list of content that you want to include in your widget, and you’re struggling to narrow down your options. A configuration Activity can be a way to put all of your ideas to good use, withoutcreatinga cluttered, confusing widget. Just bear in mind that setting up a widget shouldn’t feel like a chore, so if you do provide a configuration Activity then it’s recommended that you limit yourself to three configuration options.
Let’s add a configuration Activity to our project!
Firstly, our configuration Activity needs a layout, so create a new layout resource file named config_activity.xml.
I’m going to add the following buttons to this layout:
Here’s my completed config_activity.xml file:
Create the Configuration Activity
Now, we need to create our configuration Activity.
To start, create a new Java class named ConfigActivity. In this Activity, we’re going to retrieve the App Widget ID from the intent that launched the configuration Activity. If this intent doesn’t have a widget ID, then we’ll need to call the finish() method:
Next, we need to create a return intent, pass the original appWidgetId and set the results from the configuration Activity:
If you provide a configuration Activity, then the ACTION_APPWIDGET_UPDATE broadcast won’t be sent automatically when the configuration Activity is launched, which means the onUpdate() methodwon’tbe called when the user creates an instance of your widget.
To ensure your widget is created with up-to-date information and content, your configuration Activitymusttrigger the first onUpdate() request.
Here’s the completed ConfigActivity:
Once you’ve created a configuration Activity, you need to declare this Activity in the Manifest and specify that it accepts the APPWIDGET_CONFIGURE action:
Finally, since a configuration Activity is referenced outside of the package scope, we need to declare this Activity in our AppWidgetProviderInfo, which in this instance is the collection_widget_info.xml file:
Testing your project
Now it’s time to put your finished project to the test:
You candownload the completed collection widget projectfrom GitHub.
Wrapping up
In this article, we created a scrollable collection widget that displays a data set on the user’s homescreen.
If you want to continue working with this project, then you could try adding your own code to the onUpdate() method, to create a widget that updates with new information at the interval defined in your AppWidgetProviderInfo file (collection_widget_info).
If you do create an Android widget, then be sure to share your creations in the comments below!
Thank you for being part of our community. Read ourComment Policybefore posting.
